Three.js Uitproberen
Laatst bijwerkt op woensdag 13 oktober 2021.
Vandaag had ik een uurtje tijd om Three.js eindelijk eens uit te proberen. Three.js staat al een tijdje op mijn lijstje om er eens naar te kijken, maar ik heb er nog geen use case voor gehad. Als ik zelf iets ontwerp, is het meestal plat 2D zonder al te veel grote animaties en afbeeldingen. Ik zou kunnen zeggen dat het mij stijl is, en dat is het ook wel, maar vooral omdat ik zelf niet goed ben in het tekenen en animeren van plaatjes. Om toch maar een beeld te krijgen van Three.js heb ik op Youtube de volgende tutorial van Fireship.io gevolgd: https://www.youtube.com/watch?v=Q7AOvWpIVHU
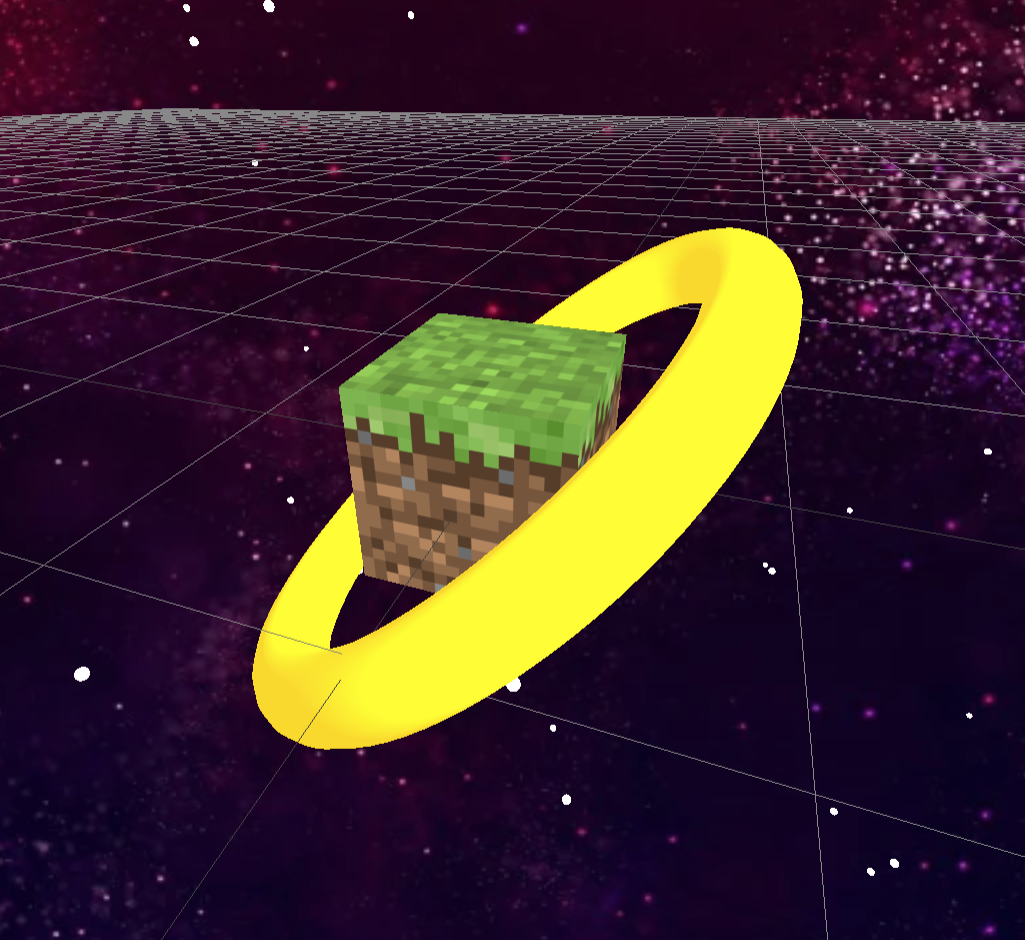
Als eindresultaat is daar de volgende render uitgekomen:

Hey, ik heb gewaarschuwd dat ik geen 3D-ontwerper ben. 😉
Zelf vind ik het een best grappig resultaat. Ik heb een paar ideeën gekregen hoe ik het voor iets daadwerkelijks nuttigs kan gebruiken, en daar ging het me vooral om. Een extra stukje gereedschap in je koffer is altijd handig, omdat je nooit weet tot wat voor een inzichten het kan leiden.
Voor de mensen die geïnteresseerd zijn in de code, deze is hieronder vermeld. Wil je het hele project clonen, is hier de link naar het project op Github: SanderGeraedts/Threejs-Uitprobeersel
index.html
<!DOCTYPE html>
<html lang="en">
  <head>
    <meta charset="UTF-8" />
    <link rel="icon" type="image/svg+xml" href="favicon.svg" />
    <meta name="viewport" content="width=device-width, initial-scale=1.0" />
    <title>Vite App</title>
  </head>
  <body>
    <canvas id="bg"></canvas>
    <script type="module" src="/main.js"></script>
  </body>
</html>
main.js
import "./style.css";

import * as THREE from "three";
import { OrbitControls } from "three/examples/jsm/controls/OrbitControls";

const scene = new THREE.Scene();
const camera = new THREE.PerspectiveCamera(
  90,
  window.innerWidth / window.innerHeight,
  0.1,
  1000
);

const renderer = new THREE.WebGLRenderer({
  canvas: document.querySelector("#bg"),
});

renderer.setPixelRatio(window.devicePixelRatio);
renderer.setSize(window.innerWidth, window.innerHeight);
camera.position.setZ(30);

renderer.render(scene, camera);

// Basically a donut shape
const geometry = new THREE.TorusGeometry(4, 0.5, 16, 100);

// Standard material that adheres to lighting
const material = new THREE.MeshStandardMaterial({
  color: 0xffda00,
});

// Creates the Donut Mesh
const torus = new THREE.Mesh(geometry, material);

// Adds Donut to scene
scene.add(torus);

// Point light => Light bulb
const pointLight = new THREE.PointLight(0xffffff);
pointLight.position.set(5, 5, 5);
scene.add(pointLight);

// AmbientLight = The sun
const ambientLight = new THREE.AmbientLight(0xffffff);
scene.add(ambientLight);

// "console log" for point light
const lightHelper = new THREE.PointLightHelper(pointLight);
// gridlines
const gridHelper = new THREE.GridHelper(200, 50);

// Add both helpers to scene
scene.add(lightHelper, gridHelper);

// Camera controls
const controls = new OrbitControls(camera, renderer.domElement);

// Create a random star
function addStar() {
  const geometry = new THREE.SphereGeometry(0.25, 24, 24);
  const material = new THREE.MeshStandardMaterial({ color: 0xffffff });
  const star = new THREE.Mesh(geometry, material);

  // Destructurize an Array of 3 elements (x, y, z)
  // that are filled by a map of a randomFloat between 100 and -100
  const [x, y, z] = Array(3)
    .fill()
    .map(() => THREE.MathUtils.randFloatSpread(100));

  star.position.set(x, y, z);

  scene.add(star);
}

// Generate 200 stars
Array(200).fill().forEach(addStar);

// Load and set the background
const spaceTexture = new THREE.TextureLoader().load("space.jpg");
scene.background = spaceTexture;

// Load the block faces
const topTexture = new THREE.TextureLoader().load("top.png");
const bottomTexture = new THREE.TextureLoader().load("bottom.png");
const frontTexture = new THREE.TextureLoader().load("front.png");

// Create the block mesh
const block = new THREE.Mesh(new THREE.BoxGeometry(3, 3, 3), [
  new THREE.MeshBasicMaterial({ map: frontTexture }), // Front side
  new THREE.MeshBasicMaterial({ map: frontTexture }), // Left side
  new THREE.MeshBasicMaterial({ map: topTexture }), // Top side
  new THREE.MeshBasicMaterial({ map: bottomTexture }), // Bottom side
  new THREE.MeshBasicMaterial({ map: frontTexture }), // Right side
  new THREE.MeshBasicMaterial({ map: frontTexture }), // Back side
]);

scene.add(block);

// "Game loop"
function animate() {
  requestAnimationFrame(animate);

  // Makes it turn real funky
  torus.rotation.x += 0.01;
  torus.rotation.y += 0.005;
  torus.rotation.z += 0.01;

  controls.update();

  renderer.render(scene, camera);
}

animate();
PS: Voor de mensen die helemaal naar het einde van deze post zijn gescrolld, hier is een fun fact: Deze post is de 100ste commit aan de repository! 🎉