How To: Split Keyboard with RP2040 and KMK
Last updated at Saturday, November 12, 2022.
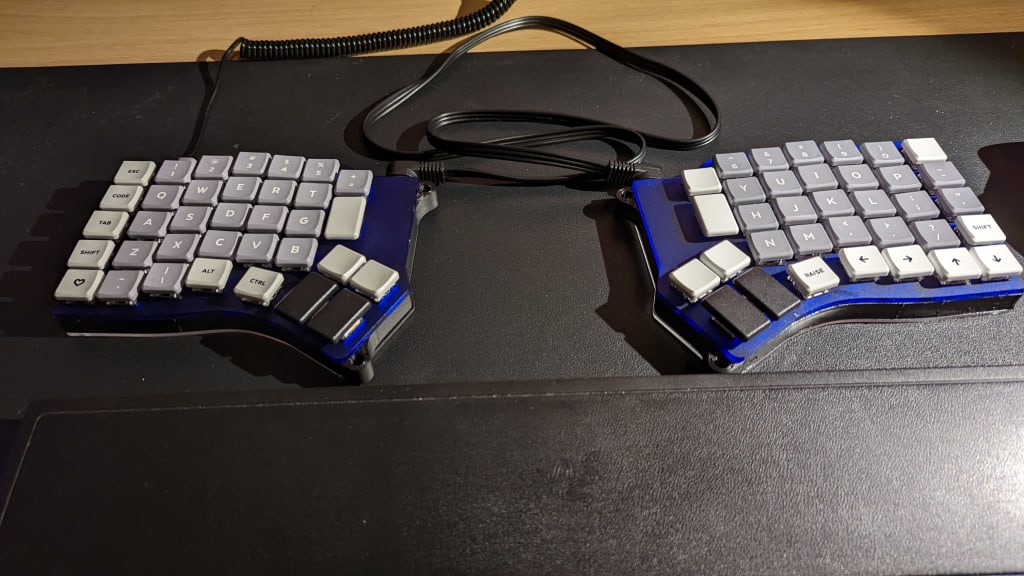
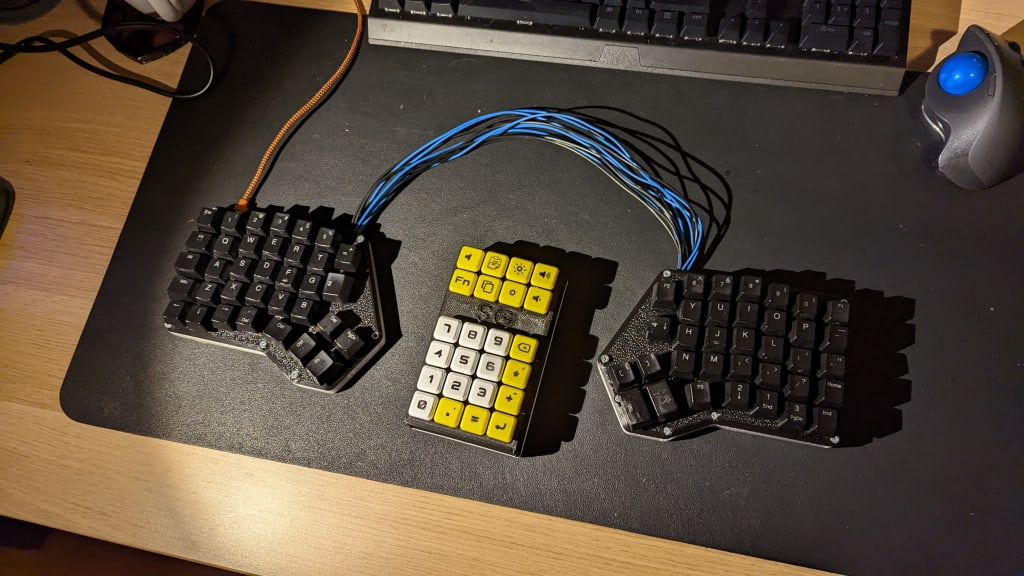
In my previous blog post I explained how I created my macropad. In that post I hinted that I want to make a split keyboard, specifically the Redox v1, but I didn’t. I didn’t make a split keyboard, I’ve already made 2 of them.
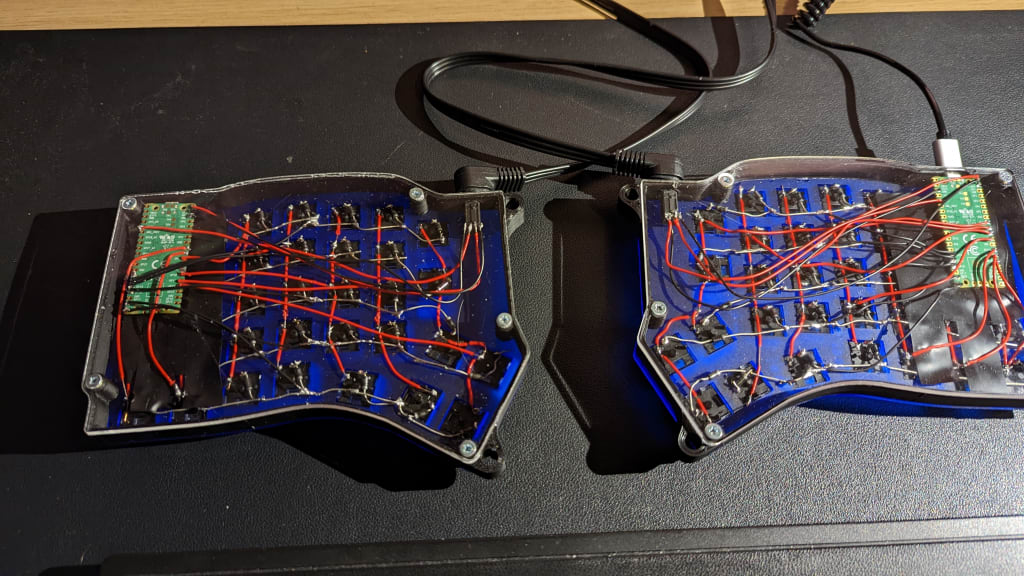
The first version of my keyboard could not be separated from each other. The rows and columns are directly soldered together with 12 cables that go outside the case, as you can see in the picture below. I chose this because the documentation to use an RP2040-based microcontroller, such as the Raspberry Pi Pico, as a split keyboard was extremely unclear. For the first version, it was especially important that I could type quickly on a keyboard and get used to the new layout.
Bill of Materials
To make everything I used the Laser cutter of the Maakplek and my 3d printer. If you only have a 3d printer, you can use the linked models I’ve added as “Case”, and honestly, I’d recommend printing the top plate as well. With a laser you can’t make the indents that are needed for the Choc switches to grip properly, so some keys are quite loose.
| Components | Price |
|---|---|
| 70x switches | €34.21 |
| 70x Diodes | €5,- /100 |
| 2x Jack plug TRRS mount | €8.90 |
| TRRS cable | €5.95 |
| 24 AWG single-core and stranded wires | €5ish |
| 2x RP2040 based microcontrollers | €9.00 |
| Legended MBK Choc Low Profile Keycaps (alpha) | €29.85 |
| Legended MBK Choc Low Profile Keycaps (mods) | €31.94 |
| Case | ¯\( ツ )/¯ |
| Threaded Inserts set - 10x M3, 4x M5 | |
| Total | €129.85 |
Wiring Diagram
One of the main reasons I’m writing this post is that I was having way too much trouble figuring out how to connect the 2 microcontrollers together. What was even more frustrating was that my own blog post about my macro path kept coming up first in searches for “split keyboard pi pico” because in the intro I talked about building split keyboards (#SufferingFromSuccess). In any case, now also for Future Sander, to make a Raspberry Pi Pico or other RP2040-based microcontrollers talk to each other via UART, you connect a GND pin, the 3V3 pin (for power), a TX0 pin (in this case GP0 , for the transfer) and an RX0 pin (GP1, for receiving data) to the same pins on the other controller.

In the schematics I only connected 1 side to make it clearer, but keep in mind that for both sides you have to connect both the rows and the columns to the microcontroller.

For the rows I didn’t feel like cutting the insulation exactly anymore, so I just soldered the wires of the diodes together. To be honest, this has been much less of a problem than I thought, and made connecting the rows to the microcontroller much easier, and maybe even more stable.

Connecting the right Pi Pico I connected the rows the wrong way round. Fortunately this is easy to fix in the firmware by defining the rows backwards, but because of that the firmware I run is slightly different than the one I’ve shared below.
Firmware
The code is the easiest part of the project. The documentation on how to use KMK is fantastic, making it mostly copy-paste work. Not to make this post unnecessarily long, I skip the installation process of CircuitPython and KMK. If you want to know more about this, check out the Getting Started guide of KMK
What is important is that the microcontrollers need a special name. The Pico that controls the left side must end with the letter “L”, for example “REDOXL”. The right Pico must have a name that ends with an “R”, so “REDOXR”. Also, the name may not be longer than 11 characters. Don’t know how? Adafruit has a post where they explain how to rename a CircuitPython Drive.
An adjustment must still be made in the firmware below. When you upload the firmware for the right side, replace split_side=SpliSide.LEFT with split_side=SplitSide.RIGHT.
# main.py
print("Starting")

import board

from kmk.kmk_keyboard import KMKKeyboard
from kmk.keys import KC
from kmk.scanners import DiodeOrientation
from kmk.modules.split import Split, SplitType, SplitSide
from kmk.modules.layers import Layers
from kmk.extensions.RGB import RGB, AnimationModes

keyboard = KMKKeyboard()

keyboard.modules.append(Layers())

# Using drive names (REDOXL, REDOXR) to recognize sides; use split_side arg if you're not doing it
split = Split(split_type=SplitType.UART, split_side=SplitSide.LEFT, data_pin=board.GP0, data_pin2=board.GP1, use_pio=True, uart_flip = True)
#split = Split(split_type=SplitType.UART, split_side=SplitSide.RIGHT, data_pin=board.GP0, data_pin2=board.GP1, use_pio=True, uart_flip = True)
keyboard.modules.append(split)

keyboard.row_pins = (board.GP20, board.GP19, board.GP18, board.GP17, board.GP16)
keyboard.col_pins = (board.GP12, board.GP11, board.GP10, board.GP9, board.GP8, board.GP7, board.GP6)
keyboard.diode_orientation = DiodeOrientation.COL2ROW

# Cleaner key names
_______ = KC.TRNS
XXXXXXX = KC.NO

FnKey = KC.MO(1)

keyboard.keymap = [
    # Base Layer
    [
        # COL GP28		COL GP27	COL GP26	COL GP22	COL GP21	COL GP20	COL GP19	<>	COL GP18		COL GP17	COL GP16	COL GP14	COL GP13	COL GP12	COL GP11

        KC.ESCAPE,		KC.N1,		KC.N2,		KC.N3,		KC.N4,		KC.N5,		KC.EQUAL, 		KC.MO(1),		KC.N6,		KC.N7,		KC.N8,		KC.N9,		KC.N0,		KC.MO(2),\

        KC.MEH,			KC.Q,		KC.W,		KC.E,		KC.R,		KC.T,		KC.LBRACKET, 	KC.RBRACKET,	KC.Y,		KC.U,		KC.I,		KC.O,		KC.P,		KC.MINUS,\

        KC.TAB,			KC.A,		KC.S,		KC.D,		KC.F,		KC.G,		XXXXXXX, 		XXXXXXX,		KC.H,		KC.J,		KC.K,		KC.L,		KC.SCOLON,	KC.QUOTE,\

        KC.LSHIFT,		KC.Z,		KC.X,		KC.C,		KC.V,		KC.B,		KC.LALT, 		KC.MO(2),		KC.N,		KC.M,		KC.COMMA,	KC.DOT,		KC.SLASH,	KC.RSHIFT,\

        KC.LGUI,		KC.GRV,		KC.BSLASH,	KC.LALT,	KC.LCTRL,	KC.SPACE,	KC.MO(1),	 	KC.ENTER,		KC.BSPACE,	KC.MO(2),	KC.LEFT,	KC.RIGHT,	KC.UP,		KC.DOWN,\

     ],

    # M1 Layer
    [
        # COL GP28		COL GP27	COL GP26	COL GP22	COL GP21	COL GP20	COL GP19	<>	COL GP18		COL GP17	COL GP16			COL GP15	COL GP14			COL GP13	COL GP12
        _______,		KC.F1,		KC.F2,		KC.F3,		KC.F4,		KC.F5,		KC.F6,			_______,		KC.F7,		KC.F8,				KC.F9,		KC.F10,				KC.F11,		KC.F12, \

        _______,		KC.EXLM,	KC.AT,		KC.HASH,	KC.DOLLAR,	KC.PERCENT,	_______, 		_______,		_______,	KC.LALT(KC.LEFT),	KC.UP,		KC.LALT(KC.RIGHT),	_______,	_______, \

        _______,		KC.N1,		KC.N2,		KC.N3,		KC.N4,		KC.N5,		XXXXXXX, 		XXXXXXX,		_______,	KC.LEFT,			KC.DOWN,	KC.RIGHT,			_______,	_______, \

        _______,		_______,	_______,	_______,	_______,	_______,	_______,    	_______,    	_______,	_______,			_______,    _______,			_______,	_______, \

        _______,		_______,	_______,	_______,	_______,    _______,    _______,	 	_______,		_______,    _______,    		_______,    _______,    		_______,	_______, \

     ],

    # M2 Layer
    [
        # COL GP28		COL GP27	COL GP26	COL GP22	COL GP21	COL GP20	COL GP19	<>	COL GP18		COL GP17	COL GP16	COL GP15	COL GP14	COL GP13	COL GP12
        _______,		_______,	_______,	_______,	_______,	_______,	_______, 		_______,		_______,	_______,	_______,	_______,	_______,	_______, \

        _______,		_______,	_______,	_______,	_______,	_______,	_______, 		_______,		KC.CIRC,	KC.AMPR,	KC.ASTR,	KC.LPRN,	KC.RPRN,	_______, \

        _______,		_______,	_______,	_______,	_______,	_______,	XXXXXXX, 		XXXXXXX,		KC.N6,		KC.N7,		KC.N8,		KC.N9,		KC.N0,		_______, \

        _______,		_______,	_______,	_______,	_______,	_______,	_______,    	_______,    	_______,	_______,	_______,    _______,	_______,	_______, \

        _______,		_______,	_______,	_______,	_______,    _______,    _______,	 	_______,		_______,    _______,    _______,    _______,    _______,	_______, \

     ],
]


if __name__ == '__main__':
    keyboard.go()
Finishing Touches
At this point, you should have a working keyboard. Keyboards can be tweaked endlessly, for example you can put the keyboard in a more comfortable position with tenting (the bolts). Or when in doubt, throw it full of RGB strips. I’m not going to cover all of that in this how-to guide, but Google is your best friend!